Oct 14, 2013

How to test is Baltic amber real?

When there are so many fakes in the market, it becomes important to be able to test amber. There are few ways to test amber, but i will write here about few most popular and best known ways to do that at you own home.

Salted water test.
This is one of best known ways to test Baltic amber, but it is considered to be not exact, because density of amber varies a lot: from 0.93 to 2. Fresh water is measured 1. This means some amber pieces float even in fresh water (that usually is white amber), some sink in salt saturated water (closer to 2 usually is amber with earth inclusions). 
If you have purchased jewelry, it most probably has thread, plastic or metal clasps, maybe some other details. Those details might make Baltic amber to sink too. 

UV test.
Baltic amber fluorescence (shines) under UV light. This test does not work on heated amber, and as i have noticed, often does not work even on natural, not heated cherry color amber - change under UV light is not so drastic as other colors especially if that cherry amber is opaque. So if amber does not fluorescence under UV light, test it in the following way.

Hot needle/pin test.
This test is also called as "smell test". 
Baltic amber ancient fossilized tree sap. Comes from trees which no longer grow on  on the surface of Earth. Baltic amber is 40-60 million years old. During that time tree saps have changed and became natural polymers, that means plastic made by nature. Each color of amber has its own smell. This is because each color of amber has been formed in different environment, with different chemical compounds in the soil, different temperature, different time of exposure to the Sun and air and so on. So, basically each amber piece has slightly different smell, and color's smell can be very different from each other.
In order to test, heat a needle or steel wire, touch with amber piece and smell what comes out.


White and very light yellow Baltic amber has a lot of amber acid (up to 8% from it's mass). For this reason it's smell is a bit sour.
Honey amber gives smell which is close to pine sap or colophon smell.


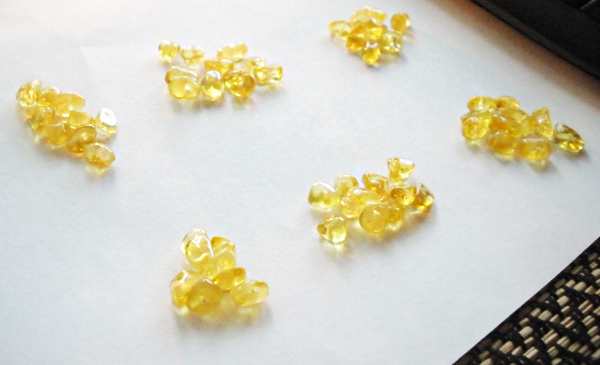
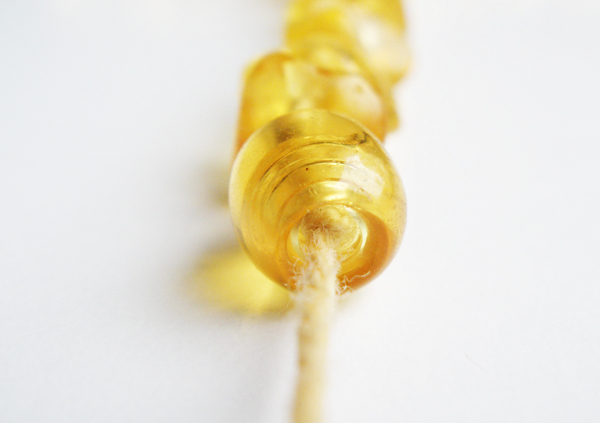
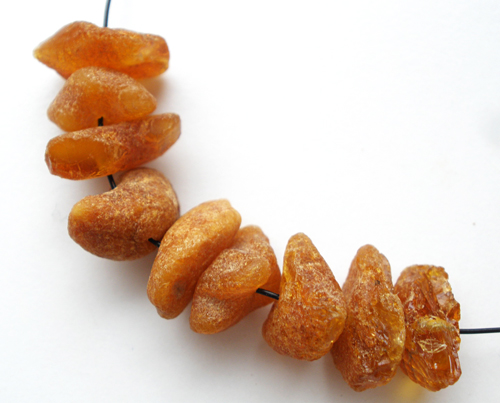
 As scientific books about Baltic amber say, clear light Baltic amber has formed inside of tree, usually under the bark of tree. It had gone through different processes than other colors of amber for this reason it has a bit different chemical and physical properties than other amber colors. It fluorescence under UV light, but when tested with smell test it smell more like plastic than pine sap. The more clear it is the more plastic it will smell. If clear light amber has, for example, slight honey color like in photo above, it will have hint of pine smell and a hint of plastic smell.  In the photo with light yellow unpolished amber, beads looks a bit cloudy, but in fact they are transparent and clear with slight shade of yellow, just matte surface makes to look them so. So they should smell like clear amber.
Hot temperature (when smoke starts to come out) enhances smell of plastic. In other colors pine smell is strong enough to overcome plastic smell, but in such light clear amber testing temperature is very important. So do not burn it - touch with hot metal and smell it right away.


Heated Baltic amber has weaker pine/colophon smell than not heated amber. It looks like, that some of that smell goes a way during the process of heating. But when you have such amber, try harder to feel that hint of pine smell. 
Scientists say, that natural cherry color also was formed by heat, most probably in forest fires. for this reason intensity of depends a lot on shade of amber and for the same reason it does not shine so dramatically under UV light.. 

Copal
In one of the videos in Youtube I saw woman saying that amber is a bit gummy, my face expression was like that: o.O ... because copal might be gummy due to young age (1-5 million years old) and process of polymerization did not went so far in it like in natural Baltic amber (age 40-60 million years old).
Copal can go through most of the tests which amber goes through, but usually it is in more gummy state than amber is and has more sweet smell that amber does. Amber's hardness is similar to nail hardness, so it is quite hard and not gummy for sure.

Air Bubbles
If you see air bubbles in stones, you know that it is glass fake. This does not work on Baltic amber. Some amber pieces do have air bubbles and from those bubbles scientists got information about what atmosphere was on earth 40-60 million years ago. So if you see bubbles in Baltic amber, it does not mean, that amber is fake.

To conclude..
The only perfect way to test amber is costly tests in laboratory. If you test amber at home, you will need some knowledge... :)

How to make Baltic amber teething necklace?

P.S. I am sorry for mistakes - English is not my native language.

Jun 27, 2013

How to make Baltic amber teething necklace?

I get many question on Etsy about how to make teething necklace, how to fix clasps and so on.
This is blog entry about which i was thinking for almost 3 years, but somehow always had "more important" things to do. But now decided to do it :)

I am sorry for photo quality, it is evening here, and I though it is better like this, than no photos at all. To make it one step harder decided to make centered necklace with tiny pendant.
So what do we need for teething necklace?
1. Beads (Beads in my shop: https://www.etsy.com/shop/amber4you?section_id=6976664)
2. Thread  (Thread in my shop: https://www.etsy.com/shop/amber4you?section_id=10378317)
3. Clasp (Screw clasps in my shop: https://www.etsy.com/shop/amber4you?section_id=10378317)
4. Paraphin or bees wax candle (soy wax is not too good here)
5. Scissors

 Light up a candle and wait until wax melts. Dip a thread in to it. I prefer to harden ~0.7" of thread, but experiment and choose your length. While wax is melted, roll thread between your fingers to get rid of access wax and to make waxed thread as thin as possible, because it might be too thick to get through bead or clasp.
 Put one side of clasp on thread. I prefer to put it so, that screw part would face end of thread. I suggest to check if both sides of clasp will have big enough holes that thread could go through. Clasps are factory made, but holes in them differs.
Make double knot (one knot upon other knot).
Cut extra thread, leaving around 1-1.5mm (~0.05") of thread, that it would not untie easily.
 Harden knot. You might do it with nail polish, special glue or wax. I prefer wax.
 Fix knot inside of clasp by pulling thread from other side. I prefer to screw in that white screw part, to check how it looks, to press knot in to place and to check if it will not untied inside of clasp. Cut generous amount of thread. It usually  needs  0.8 yd - 1.1 yd for 12"-13" knotted necklace.
 As I am making necklace with pendant, I need to divide beads in to 2 groups - one side and other. Also some beads should be left as extra beads, because it is possible to brake them, there might be a need to use few beads more on one side than on other and so on.
 You might place a knot between clasp and first bead, this time i did not do this. Harden other side of thread as the first one. You might have to repeat this several times, because hardened end gets soft when gets some pressure (for example when placing bead with some force). Place a bead.
 Start knotting.
I mostly use thick thread which hardly goes through holes, so i need just 1 knot between beads. That saves a lot of work but sometimes creates trouble, because some beads somehow manage to get smaller holes than others and thread does not go through them. I leave such beads and knot another necklace with thinner thread and with smaller holes in clasp and beads.
 When knotting, I have noticed, that i needed longer necklace than i have beads, so adder 4 rice shaped beads in to necklace - this is how creativity gets in to this world :)
Then checking how many beads should be added to second side to make pendant in the middle
 It looks it is enough.
And here it comes - most important and most difficult (at least for me) part in whole necklace making process - placing second part of clasp.
Put a clasp that it would face end of thread with screw-in part.
 Make a knot, and  when finishing it, slide it as deep as you can in to clasp. This is not necessary, but i find it to become more secured.
 You may use nail polish, special glue or liquid glue as i use this time. Get ready white screw part, because you will have to act quickly after placing glue inside. Hold 2 last beads and clasp firmly, that clasp would stand so as you wish it to see at the end. Place tiny drop of glue inside of clasp. Screw in white part. If there will be too much glue it will get out of clasp, one possible way to solve this is to glue on last bead to clasp. If you leave thread with glue, it might brake, because it will become as plastic in width of thread.. Also if you place too much glue, clasp might crack or brake. If you will place too little glue, thread will get out and you will have "broken" necklace.
If you will do this part wrong you will possibly have to remake necklace from 0, or if you will be making necklace without centered pieces, you may simply remove last bead or two, loosen up some thread, harden it, place a new clasp (one with glue inside is not usable any more) and do next steps.
 After placing white part inside you'll see, that thread inside took some place, and white part does not fit so well as before - it's normal.
 When glue hardens, place another side, to check how much of spare white part you have.
 Cut with scissors or nail clippers some of white screw in part.
 Check how they match together.
 Thats all! :) Necklace is already made!
 All designs and ideas are up to you. You may mix various colors, stones (for example turqouise), hazelnut wood beads - those are healing materials from nature too!
And if you think this is too much trouble to make one, you always can find already made teething necklaces for sale :)
Check up my shop for Baltic amber baby teething necklaces:
https://www.etsy.com/shop/amber4you?section_id=10413188

If you have any questions - do not hesitate to ask!. I will answer faster on Etsy than here :)

P.S. I am sorry for mistakes - English is not my native language.

Mar 20, 2013

Which baby teething necklace is best for my baby?

This is one of the questions which i get quite often. I though it would be good idea to write a blog entry which would help to make a decision.

There are couple things which are important when deciding what you need: surface and color.

SURFACE:
There are few kinds of teething necklace's surfaces: raw, unpolished, polished, heated.

Raw Baltic amber necklaces have untreated beads. Beads are selected, drilled and made in to necklaces. "Sharp edges" give massage which increases blood circulation, which help for healing process and to distribute substances which are absorbed through skin. They have most of surface, so easier than other bead types releases amber acid. You may read more about amber acid in following blog's post:
                                                                  Raw Baltic amber

Unpolished Baltic amber is such kind of amber where amber is shaped ir "sharp" edges are treated, but matte surface is left. Such kind of beads has smaller surface in total than raw amber, but it usually touches skin with more surface than raws. For this reason such amber is a bit less effective or has same affect as raw amber.

                                                        Unpolished Baltic amber

Polished Baltic amber is such kind of amber where surface is polished to shiny state. Polishing might be done in abrasive way (abrasive-polishing dust, sand paper) or by heating. Such amber has less surface in total, harder releases healing oils and amber acid, but looks much more beautiful. I have got many letters which wrote that such amber helped to solve various issues, so it has healing properties for sure too. 
                                                             Polished Baltic amber.

Heated  Baltic amber is such kind of amber which was effected by heat to change some properties like: to enhance color, to change color, to increase clearness, sometimes heat might be used as a way to polish. Most (not all) cherry color amber is heated. I suggest to search for sellers who inform is amber heated or not.
The more amber is heated the lower healing properties it has. So slightly heated amber has slightly lower healing properties than polished amber. Amber heated to the point where it will change color (like in cherry amber case), has lowest healing properties from all ambers.
                                                                    Heated Baltic amber

COLOR
Cherry color Baltic amber.
As mentioned before, most of cherry Baltic amber is heated. Looks amazing, has some healing properties, but there can be and more effective colors to heal.

                                                            Cherry color Baltic amber

White color Baltic amber
It is almost opposite of  cherry color. It contains so much amber acid, that when burned as incense it has sour smell. Less than 1% of Baltic amber is in white or very light yellow color, so for this reason and for healing properties this color is very valued. White Baltic amber is always polished or unpolished, because in raw state it is in dark yellow or brown color due to surface oxidation. 
 White color Baltic amber

Yellow color Baltic amber.
Cloudy or opaque ambers usually have a bit higher healing properties, but clear or semi clear yellow amber is something what gives amber name "Sun stone" - it looks like pieces of Sun. Yellow is color of energy, and everyone needs energy especially if there is health problem. So yellow amber is universal amber.
                                                               Yellow color Baltic amber

Brown color Baltic amber . 
Brown amber is very good for various problems but it especially helps body to remove what is unnecessary to it. So if there is digestion problems, toxins in the body, skin blemishes and so on, brown amber is what you need. 
                                                              Brown color Baltic amber

Red Baltic amber.
Red amber gives more energy to become active, trust in you own abilities. Helps to man's and boys reproductive organs. So it is balanced for grown up people, unless you child needs encouragement or healing powers for boys reproductive organs.
                                                             Red  color Baltic amber

Black Baltic amber.
Jet black amber is something what people in ancient times avoided. It was used to guide soul safely in to afterlife and in black magic. People did not worn black amber but had somewhere at home "in case it would be needed". Children under 10-11 years old should not wear any black stones, amber especially. Many people forgot this knowledge and are selling black amber teething necklaces as something cool, for some sellers money is something more important that the results for the customers.
        Black color Baltic amber (few beads are cherry, that can be seen from shade which they drop)
Amber color Baltic amber.
We do not have such name of color in our (Lithuanian) vocabulary, so we add those pieces to yellow, brown or red ambers depending on shade.

Conclusion:
My personal favorite necklaces are unpolished or raw necklaces in white, yellow or light brown/honey colors. When my friends ask for polished necklaces I recommend yellow & white necklaces, somethimes not heated honey color necklaces.

I hope this blog entry will be helpful to you!


Baltic amber teething necklaces at my shop:
https://www.etsy.com/shop/amber4you?section_id=10413188
My Baltic amber shop: amber4you.etsy.com

It might also be interesting for you to read:
What is amber and Baltic amber?
How Baltic amber can be used for healing and what is amber acid?
What is amber for? (some information)
About ambers of the world and copal
Who am I? (about me)